


 woohoo...I am caught up...today I am thankful for my crafty nature. My mind is in need, as of late, to be occupied in non taxing manners. My mind tends to swirl about on topics without any immediate solution, so I use crafts to distract my brain. Most of the time it works...I can derail the destructive thoughts and in the end I get something pretty to give away or keep and put somewhere in my house. Here is my favorite so far. I have had these Dala horses drawn on several canvases for about 6 years. I pulled one out and started covering it with fabric. I was going to leave the horse in the middle canvas colored, but my mom and dad offered a suggestion. So I filled the horse in with white and gray fabric. I really, really, like it. I have it on my hearth in front of my dream board...so that i can see it all day everyday. I have about 6 more canvases..please leave me a comment about another fun way to finish it.

 |
| here is the original |
 |
| I had to add some extra colors, but this was the hit of the nail salon! |

 |
| this was my first pig...I found him at a 15 mile garage sale |
 |
| I love this one made out of scrap metal |
 |
| Please excuse the personal goodies in the background, but I couldn't wait to put it up. |
 |
| Step One - Visit your local home improvement store, and pick up a few paint chips. I know they put these out for people to take, but I still have trouble taking them without feeling like a thief. That doesn't stop me though! I picked up a slew of different fall and harvesty colors. |
 |
| Step Two - cut each sample down to 1 inch strips. The Behr samples I got at Home Depot are five inches so they cut down nicely and evenly...I hate needing to do math. Then if you are a control freak as I appear to be...lay out the color scheme as you want it to look in the garland. |
 |
| Step Three - Choose the first color and put a piece of tape on the lightest color, then bring the darker color around and make a circle. |
 |
| Step Four - I chose to link two of the same color together, so no color would be lost in the garland. Thread another strip through the circle you just made, and tape it closed. Continue with this step until the garland is the length you want! |
 |
| Step Five - To create the leaf embellishment in the center of the garland...turn over one of the paint chips. I free handed these leaf shapes, but if you want there are tons of leaf templates to be found on Google images. |
 |
| Hint! Make sure you either have wrong sides or right sides facing each other or you have 2 leaves that cannot be put together with the color swatch on the outside. OOOOPS! |
 |
| Step Six - After cutting the leaves out the right way (way to go me)! Attach double stick tape in the middle and put the leaves together. |
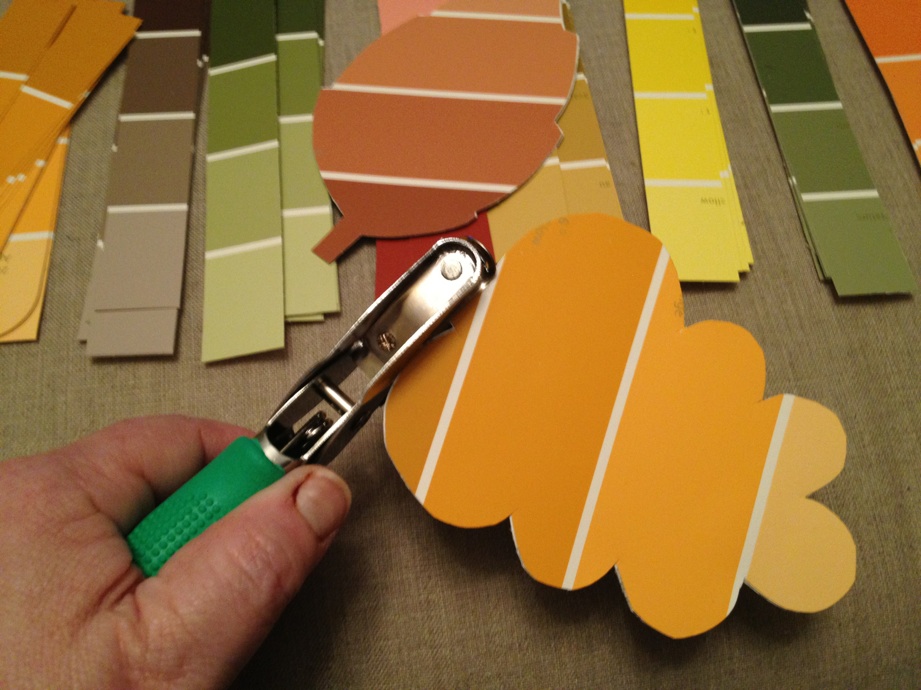 |
| Step Seven - Use a small hole punch to create a hole in the stem of each leaf. |
 |
| Step Eight - Add a twine string between two leaves. This way they will hang nicely in the center of the garland |
 |
| Step Nine - I can't show this step in real life...but once the garland is tacked up in the middle. ..wrap the twine around the tack and shift the leaves up or down to your liking. |
 |
| Finished garland and my very decorated hearth area. |

